
How to manually Migrate your WordPress Site in 6 Easy Steps
Step 1: Create a backup of your WP-Content Folder

This not only the first step of the migration, but good practice to do on a regular basis to ensure that you have a solid backup of your website. Ask yourself, when is the last time you had a backup? If its longer than 30 days your website is at risk. If you are in cPanel, select the wp-content folder, right click, and compress to ZIP file.
There are many plugins out there in the world that can handle doing a backup, but we recommend using FileZilla as a FTP client to ensure that you can download this backup and then upload it to your new host. By doing this it allows you see hidden dot files like your .htaccess and .user.ini or php.ini which we cover how to change in this article.
Step 2: Export your MySQL Database
Working in your MySQL database seems super confusing and almost makes you feel like a little hacker, so we encourage you to get in there and move through the tables. By knowing how to get into your database, it allows you to do things like change your password, make sure you have the correct database connection strings, and do many other things.
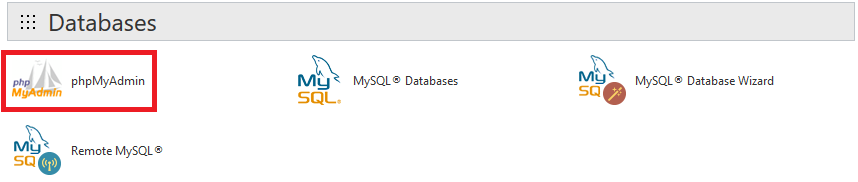
Most hosts use cPanel and PHPmyAdmin, these two applications make it easy and possible for you to migrate to your new host. Here is a look at what you should find in cPanel
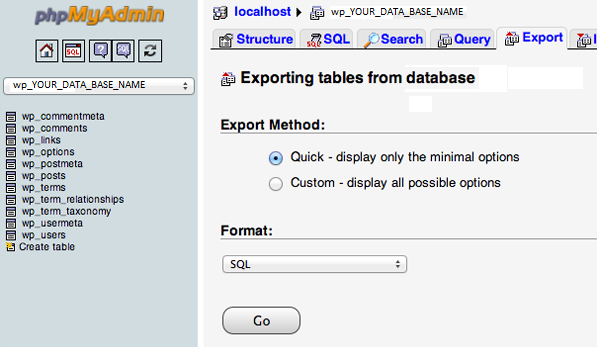
Select the database on the left hand side and then select the Export option at the top right. The default setting is set for SQL and that is more than what we need. If you need help with doing this part, I recommend to drop a us line! Once you have your wp-content.zip file and your MySQL Database export, we are ready to move.
Step 3: Create your WordPress Database on your new Hosting Server
Before we can begin the migration to the new web host, we need to create an environment for a WordPress installation. To do this you must create a database that you can import your SQL data into.
Login to your new web host with the user credentials they have supplied you and connect to the cPanel software. For our guide we will be using the MySQL Databases application. If your web host doesn’t have that application running then you will should contact their support team to discover their method of creating new databases.
The steps to create a database are quite simple:
• Open MySQL Database and create a new database with an appropriate name for your website.
• Create a new MySQL user (with a secure password).
• Add this user account to the new database and grant it All Privileges.
Write down the database name, the new MySQL username and its password. You will need them soon.
OR
Use cPanel Installatron to create a basic WordPress setup. *Recommended
Step 4: Edit the wp-config.php file
Browse to the folder on your local computer where you downloaded your website files to. In that folder there is a file called wp-config.php that controls the access between WordPress and your database.
Make a copy of this file and store it in another folder on your local computer. This is necessary for restoring the changes we are about to make should something go wrong later.
Open the original version of the file with your favorite text editor and make the following three changes:
1. Change the Database Name
Locate the following line:

The db_name portion of this line will currently be set to the MySQL database name of your old web host. This must be changed to the name of the new database you have just created.
2. Change the Database Username
Below this you will find the line:

In this line you need to change the db_user portion from the username of your old host to match the new username you have just created.
3. Change The Database User Password
Finally, edit the third line:

As with the others the db_pass section of this line must be changed to the new secure password you created for your MySQL user.
Save wp-config.php and close the file.
Step 5: Import the Database
Now that you have a new database to work with we can begin the import process.
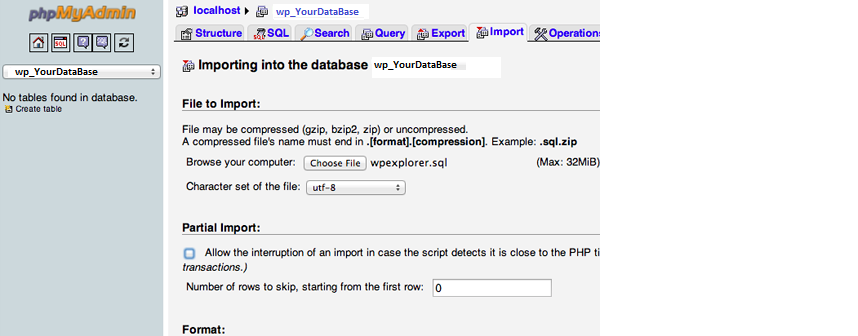
Launch phpMyAdmin from the cPanel software on your new server and select your new database from the list on the left hands sidebar. Once it opens select the Import tab from the navigation menu.
In the File to Import section click the Choose File button and select the SQL file you exported previously.
Un-tick the Partial Import check box, make sure the format is set to SQL and then click the Go button. The database import will now begin.
The time this import takes varies depending on the size of your database. You should receive a message informing you of the success of the import when it has finished.
Step 6: Upload your wp-content.zip to your new host
Now that you have your database prepared and ready to go, this is where you need to upload your wp-content.zip folder. It’s important that you already have WordPress installed at this point or all you will have is a wp-content folder. Please see how to install an application with cPanel if you are not sure or how to manually install wordpress.
Once your file is uploaded, rename the current wp-content folder to “wp-content.old”, right click on the zip and then extract it into the web root or public_html folder along with the other WordPress files. If you are changing domains, you will need to run a search and replace in the database. Once that is completed you are Done!
Conclusion
Migrating a WordPress site can be broken down into 6 easy steps and with a little help from us we can make sure your site is optimized the best it can be. If you are still not sure on how to do all this then fill out this migration form request and we can guarantee a smooth transition within 24 hours. Some company’s hold your site hostage for 3-4 days or even longer up to 7-10 days for a migration to occur, we have the tools and manpower necessary to make your transition seamless. Hire us Today!